How to make a snow globe cross stitch card

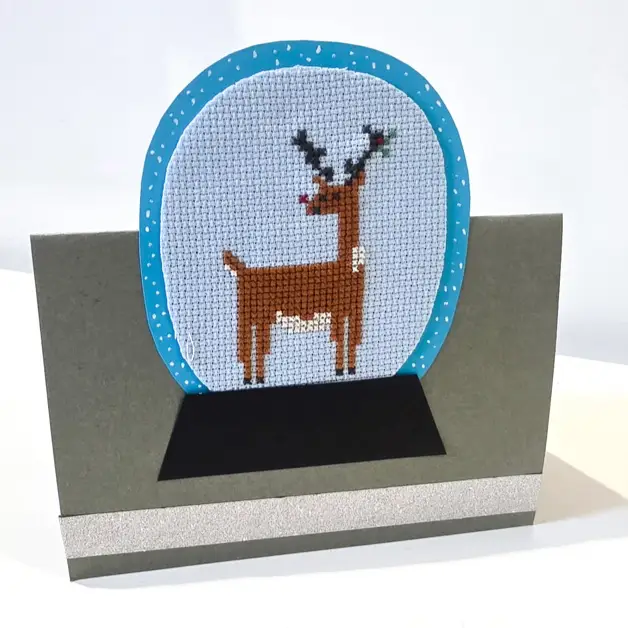
I have been on the hunt for different ways to use my mini motifs and patterns, rather than them simply being framed or worse still left in a folder. As Christmas is approaching I tought I would look at some new ways to incorporate them into cards. And so the snow globe cross stitch card was born! Super simple and works with lots of designs. You don’t have to use the same one as me.

How to make a snow globe cross stitch card:
You will need:
- A small stitched cross stitch motif on pale blue aida. I used my reindeer pattern.
- Card in grey, black and light blue
- Silver glitter washi tape
- A white chalk marker
- Double sided tape
- Scissors
- Iron on interfacing
How to make:
- Iron on your interfacing to the back of your stitched motif, and trim into a round-ish shape.
- Then stick this to your blue card with double sided tape (I love the roller tape dispensers for this) and trim it down to leave a roughly 1cm boarder of blue showing around the stitched design.
- Fold your grey card in half landscape and stick a strip of glitter washi tape near to the bottom edge.
- Then using double sided tape, stick the blue cross stitched shape to your card positioning it so the top half sticks up above the fold line.
- Cut a base for your snow globe, a trapezoid (retangle with short sides sloping inwards)
- Glue this overlapping the base of the globe.
- Finally add some snow by dotting your chalk marker over the blue card boarder.