Free embroidery pattern – Plant Lady

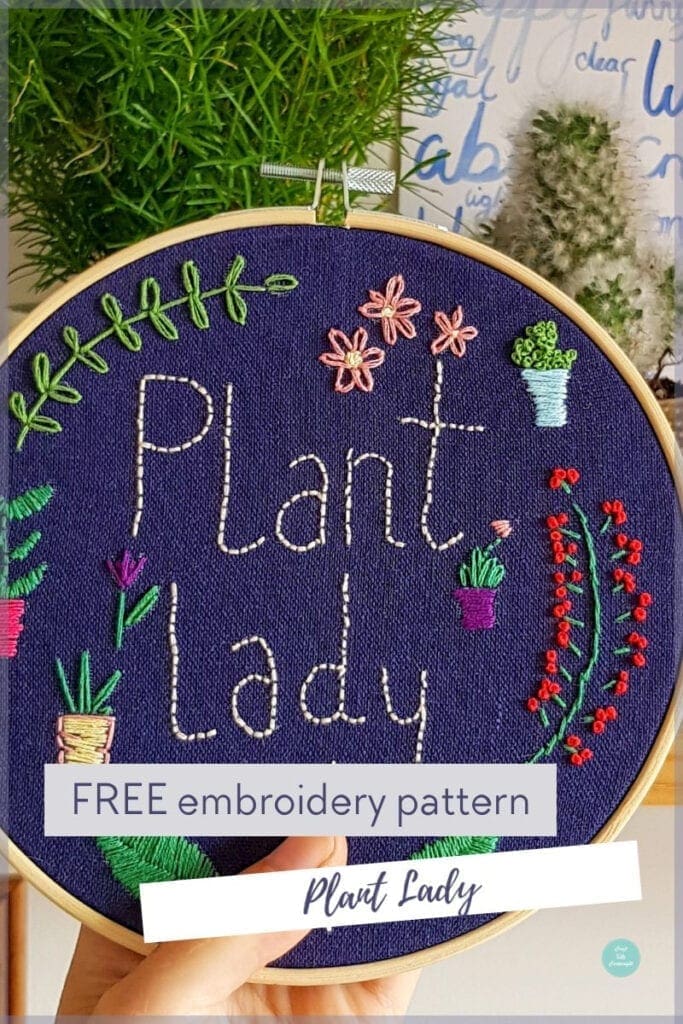
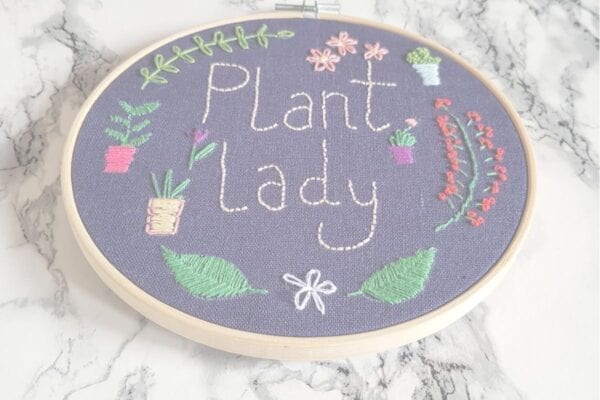
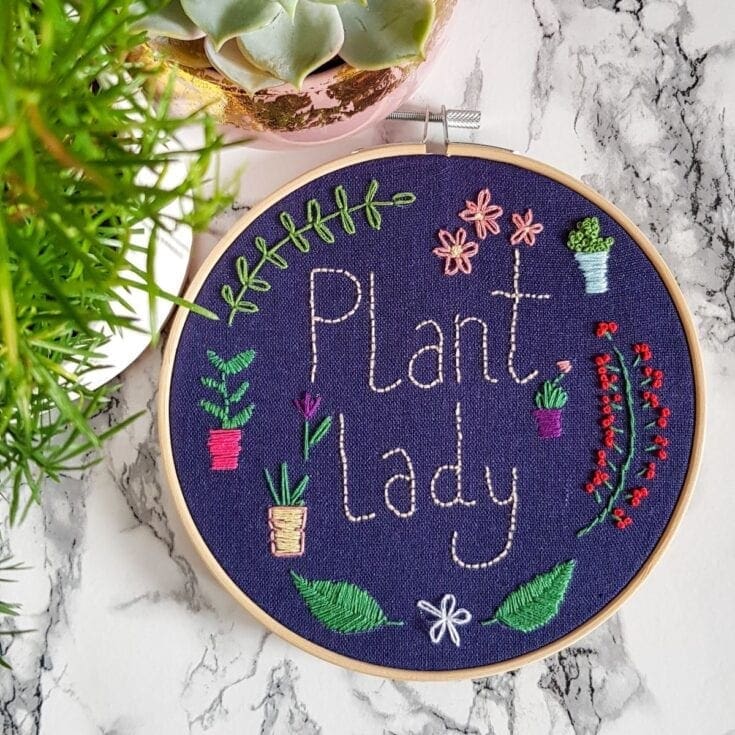
This free embroidery pattern for my plant lady design showcases a variety of simple hand embroidery stitches, such as lazy daisy, satin stitch, stem stitch and French knots. You can download a free printable PDF pattern to stitch your own at the bottom of this post.

I really do love my houseplants. I’ve gathered a large succulent and cacti collection over the past year and I thought I’d combine my two loves in my latest project.
Plant lady embroidery
Materials
- Cotton fabric
Standed cotton embroidery threads
- Light green, dark green, cream, red, dark pink, light pink, light blue, purple, white and yellow
Tools
- embroidery scissors
- Embrodiery Hoop
- Embroidery needle
- Fabric transfer pen
Instructions
- Open the hoop and place the fabric over the inside ring. Place the outer ring over the top and tighten.
- Pull fabric taught and even.
- Transfer the design to the fabric using the pen.
- Start stitching the plant lady text. Using 3 strands of cream. Stitch using backstitch.
- Fill plant pots with satin stitch in three strands. Stitch horizontally.
- Create the flowers using lazy daisy stitch.
- Bottom leaves are stitch in 3 strands light green, leaf stitch.
- Flowering branch, is stitched in 3 strands dark green, with 3 strands red for the french knots flower buds.
- Succulent is filled with French knots 3 strands light green.
- Tall potted plant stem is backstitch and leaves are stain stitch 3 strands dark green
- Flower and flowering potted plant are backstitch.
I’ve tried to show some of my favourite embroidery stitches in this design. Such as backstitch and french knots. But you can mix up the pattern anyway you choose with different stitches and colour combinations.
Don’t forget I love it when you share your versions of my designs. You can share them with me on Facebook, Twitter and Instagram. Just remember to tag me @craftcartwright so I can spot them.
How to transfer the pattern
For a full tutorial check out this post – How to transfer an embroidery design (5 ways)
How to finish your embroidery
You can choose to simple frame in the embroidery hoop, but this design would also look beautiful stitched into a cushion cover, used on a tote bag or even with the help of dissolvable fabric stitched on the back of a denim jacket.
However you choose to stitch it, I’d love you to share your finished projects with me on Facebook and Instagram. Tag @craftcartwright so I can see your makes.
How to download
Click on the download button. This will instantly download a easy to read PDF pattern. You can then choose to print it for transferring your pattern from paper. Or transfer your pattern directly from the screen. This works well if you have a tablet device.
The pattern is scaled to be printed on A4 paper and intended to fit a 7” hoop.
*Please note if you adjust the size of your paper, the scale of the pattern will be altered.
How to print
Once you have downloaded the pattern, simply open the PDF and click on the print icon. With your printer on, it should automatically print. Remember to ensure you have a4 paper selected.
Printing on normal copier paper is fine for this template, but you may choose to print on thicker paper or even light card if you want to re-use the template multiple times.