How to do chain stitch

I love to do freestyle embroidery as well as cross stitch. Last week I love about how I mastered French Knots, which are great for adding texture. Another of my favourite stitches for texture and lettering is chain stitch. Here’s a simple tutorial for how to do chain stitch embroidery.


Yield: Chain stitch
How to do chain stitch
Prep Time:
2 minutes
Active Time:
10 minutes
Total Time:
12 minutes
Difficulty:
easy
Materials
- Even weave fabric
- Embroidery floss
Tools
- Embroidery needle
- Embroidery scissors
- Embroidery hoop
Instructions
- Cut a length of floss
- Divide the floss into two stands
- Thread your needle
- Tie a small knot at the other end of the floss
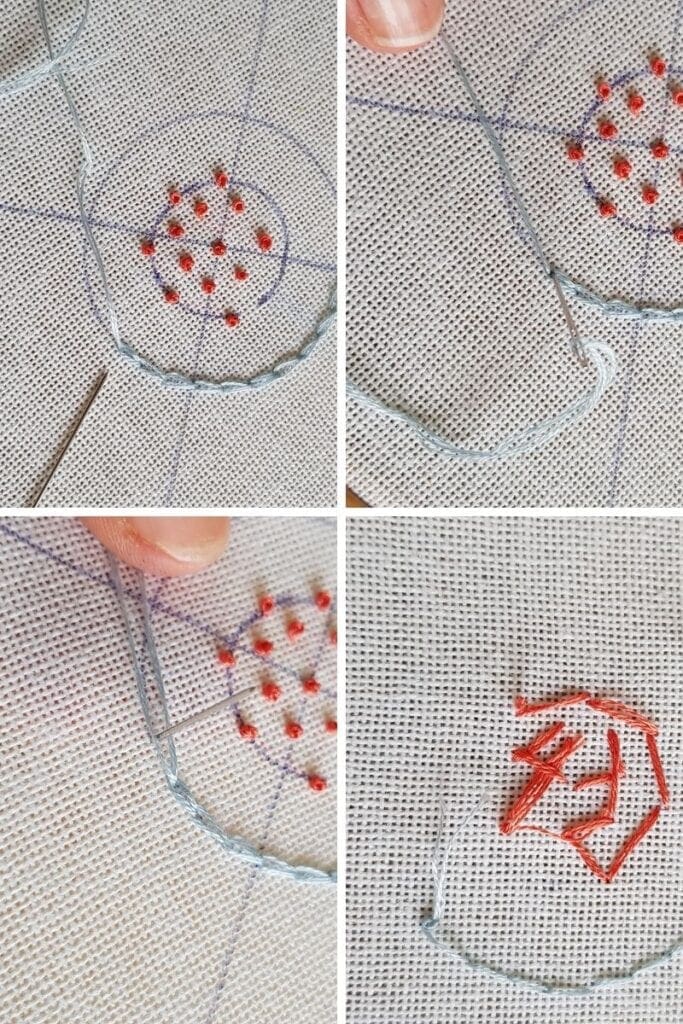
- Stitch up from the back of your fabric
- ush the needle back down where you made your first stitch, do not pull all the way through!
- Move along slightly and bring your needle up and the through the fabric and the loop of thread you had just made. This is your first chain.
- Repeat as needed.
- Once you get to the end of your chai, make once final stitch over the last chain to secure.
- Then secure the thread at the back of your fabric.