DIY watercolour wall art with your Cricut

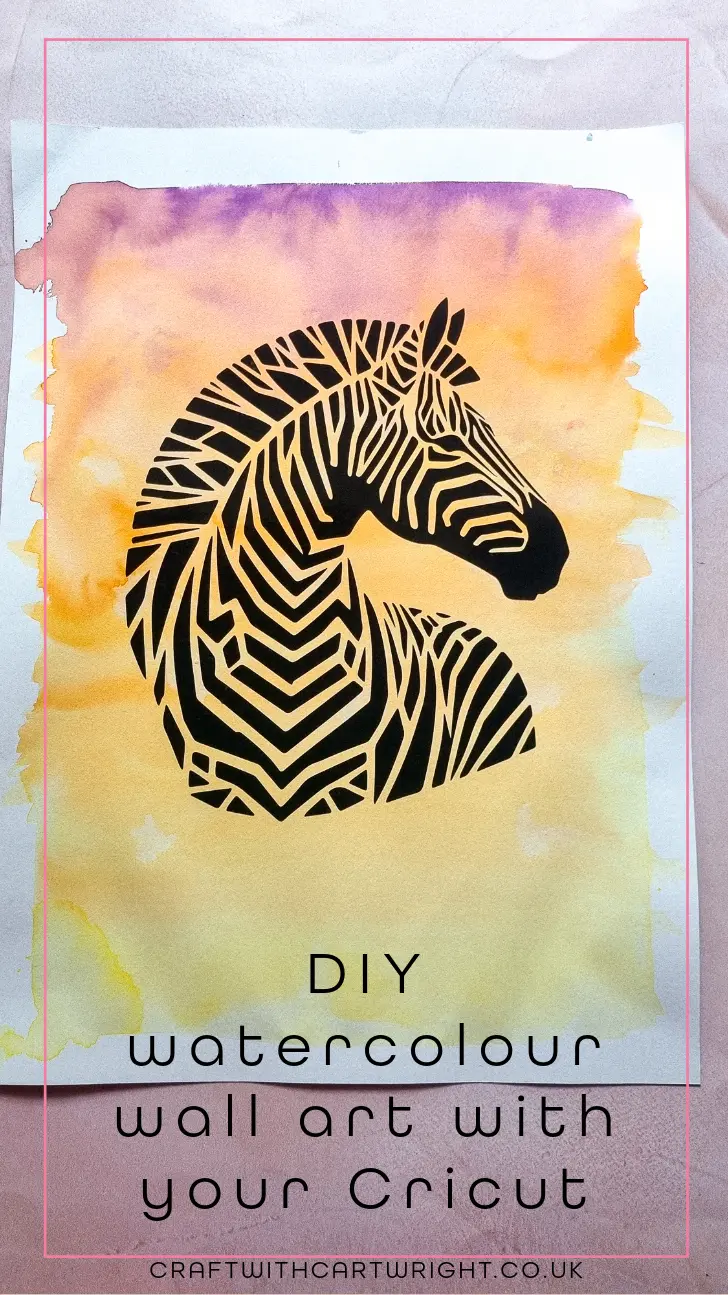
You don’t have to be an artist to creating beautiful, personalized wall art. This straightforward and fun DIY watercolour wall art featuring a geometric zebra head design is the perfect project for those of you that think you can’t create art. This project is perfect for beginners and combines simple watercolour techniques with vinyl cutting using a Cricut. To make this process even easier, I am offering a free SVG template for download.
Materials Needed:
- Cricut machine
- Black Vinyl
- Transfer tape
- A3 watercolour paper
- Watercolour paints (colors to create a sunset effect)
- Brushes
- Water
- Painter’s tape or masking tape
- A cutting mat
- weeding tool
- scraper
Step-by-Step Guide:
1. Prepare the Watercolour Background
Start by preparing your workspace. Tape down the edges of the A3 watercolour paper to a flat surface to prevent it from warping as it dries.
Wet the Paper: With a wide brush, apply clean water over the entire surface of the paper. This technique is called “wet on wet” and helps in achieving smooth blends with watercolors.
Apply Watercolours: While the paper is still wet, begin applying your watercolour paints. For a sunset effect, I like to use a combination of yellows, oranges, pinks, and purples. Start with the lighter colours at the bottom and blend upwards to darker shades. Let the colours bleed into each other naturally for a smooth gradient. Work quickly and don’t fuss over it. Once satisfied with the look, allow the paper to dry completely.
2. Download and Prepare the SVG File
Download the geometric zebra head SVG file. Simply sign up to unlock this exclusive content.
Upload to Cricut Design Space: Once downloaded, upload the SVG file into Cricut Design Space. Adjust the size of the design to fit your A3 watercolour paper. For this project, I recommend sizing the design to fit comfortably within the margins of the paper, allowing some of the beautiful watercolour background to show.
3. Cut the Vinyl
Select Vinyl Setting: Load your vinyl onto the cutting mat and into the Cricut machine. In Design Space, set the material to vinyl and let the machine do the work. The intricate details of the geometric zebra head will be cut precisely.
Weed the Vinyl: After the cutting process is complete, carefully weed out the excess vinyl. Use a weeding tool to remove small pieces from the design, leaving only the zebra head on the backing paper.
4. Transfer the Vinyl Design
Apply Transfer Tape: Cut a piece of transfer tape slightly larger than your design. Peel the backing off the transfer tape and carefully place it over the vinyl design. Use a scraper tool to smooth out any bubbles and ensure the transfer tape adheres well to the vinyl.
Position the Design: Once the transfer tape is securely in place, peel the vinyl backing off. Now, position the design over the dried watercolour paper. Gently lay the transfer tape with the vinyl onto the watercolour paper, ensuring it is centred and straight.
Adhere the Vinyl: Use the scraper tool again to firmly adhere the vinyl to the watercolour paper. Start from the centre and work your way outwards to avoid air bubbles. Slowly and carefully peel the transfer tape off, leaving the vinyl design on the watercolour paper.
5. Final Touches
Your DIY watercolour wall art is now complete! The combination of the vibrant sunset background and the striking geometric zebra head creates a stunning piece that can be framed and hung in any room.
Tips and Tricks:
- Experiment with Colours: Don’t be afraid to experiment with different watercolour shades. You can create a range of backgrounds from soft pastels to bold, metallic colours.
- Test Cut: If you are new to using your Cricut machine, consider doing a test cut with a simpler design to get the hang of the process.
- Smooth Application: Use a scraper tool to smooth the vinyl and transfer tape to ensure a clean application without bubbles.