
FREE Rainbow gnomes cross stitch PDF pattern
If you’re like me, you probably love adding a splash of colour to your cross stitch projects. That’s why I’m excited to share this rainbow gnomes cross stitch pattern with you. It’s a free PDF pattern that’s easy to follow, making it perfect for both beginners and seasoned stitchers alike. This pattern combines vibrant colours with a cute gonk design, which I know you will love.

What You’ll Need
Before diving into the pattern, let’s go over what you’ll need to get started. If you’re familiar with counted cross stitch, you’ll likely already have these supplies on hand:
- Embroidery fabric: Aida cloth is my go-to, especially for beginners, because the grid-like structure makes counting stitches a breeze. For this pattern, a 14-count Aida works well.
- DMC embroidery floss: You’ll need a variety of colours to create the rainbow effect.
- Needle: A standard cross stitch needle is perfect. Size 24 is a good option for 14-count Aida.
- Hoop: An embroidery hoop will help keep your fabric taut and make stitching easier.
- Scissors: Small, sharp scissors will make cutting threads clean and precise.
- The pattern: You can download the free PDF pattern at the bottom of the post.
Starting Your Rainbow Cross Stitch
Once you’ve gathered your supplies and printed the pattern, it’s time to start stitching. The pattern is laid out in a grid format, which is typical for counted cross stitch. Each square on the grid represents one stitch, and the symbols within the squares correspond to the different colours of embroidery floss you’ll use.

Step 1: Preparing Your Fabric
Start by cutting a piece of fabric that’s large enough to accommodate the pattern, plus a few extra inches around the edges. This extra space will give you room to secure the fabric in your embroidery hoop and allow for framing later, if you choose to do so.
Once your fabric is cut, find the centre. I usually fold the fabric in half and then in half again, creasing it gently. The point where the creases intersect is your centre. This is where you’ll begin stitching.
Step 2: Setting Up Your Embroidery Hoop
Place your fabric in the embroidery hoop, centring the area where you’ll start stitching. Tighten the hoop until the fabric is taut but not stretched too tight. This will keep your stitches even and help prevent puckering.
Step 3: Stitching the Pattern
Begin stitching from the centre of the pattern and work your way outward. I find this method helps to keep the design centred and balanced. Follow the chart carefully, matching the symbols to the correct colours of floss.
If you’re new to counted cross stitch, remember that each stitch is an X shape. You’ll first pull the thread through the fabric to the front, creating a diagonal stitch from the lower left to the upper right. Then, you’ll bring the needle back down to create the second diagonal, forming the X.
For this rainbow gnomes pattern, you’ll be using bright, colourful threads. I recommend starting with one colour and completing all the corresponding stitches before moving on to the next. This helps keep the project organized and prevents you from losing your place in the pattern.
Step 4: Finishing Up
Once you’ve completed all the stitches, it’s time to finish your piece. Carefully remove the fabric from the hoop and trim any excess thread from the back. If you’re planning to frame your work, you might want to give the fabric a gentle press with an iron to remove any wrinkles. Just be sure to place a cloth over the stitches to protect them.
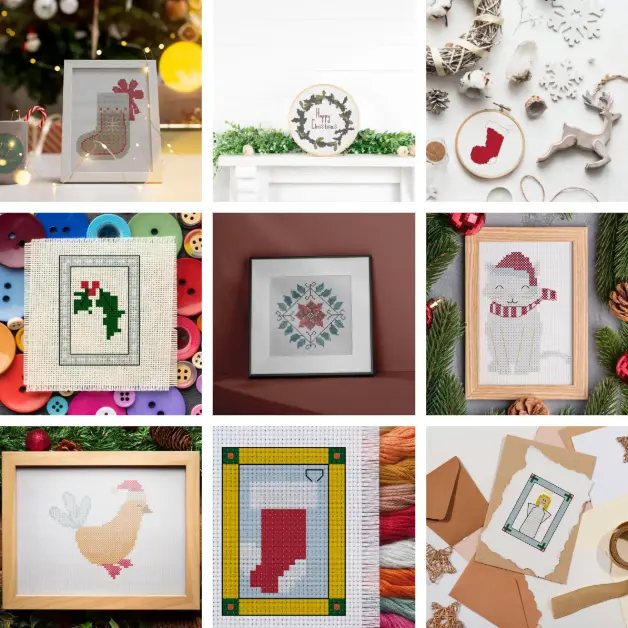
Stitchers Gallery

Downloading the Pattern


This will be a great addition to my gnome collection
Great! Don’t forget I love to see your stitched projects, share your photos on social media and tag @craftcartwright so I spot them!
They are so cute. Thank you so much
you’re welcome