


Cross Stitching on Wooden Blanks: Top Tips for Beginners

If you’ve ever wanted to embroider on something other than aida fabric, why not take a step into the exciting material combination of cross stitching on wooden blanks. These are my top tips for beginners.

1. Choose Your Blank Wisely
When it comes to cross stitching on wooden blanks, your choice of material matters. Opt for bamboo or plywood blanks specifically designed for stitching. These laser-cut shapes come with pre-cut holes, making them ideal for beginners. Whether you’re creating a pretty necklace, a scissor fob, or a bag clip, these blanks are quick to stitch and perfect for gifts.

2. Gather Your Materials

Before you start, assemble the following:
- Wooden Blank: Pick your favourite shape.
- Size 28 Needle: The right needle ensures smooth stitching. (I prefer to use the plastic ones rather than metal as you have some flexibility with these)
- Cotton Embroidery Floss: Choose colors that complement your design.
- Scissors: Sharp ones for cutting floss.
- Optional: Scrapbook paper, white craft glue or Mod Podge, and jewelry findings (jump rings, necklace chains, keyrings).
- Counted cross stitch pattern
3. Thread Your Needle Like a Pro
- Cut a length of embroidery floss (no longer than the length of your arm. (I find if it’s too long the wood wears at the thread and it frays)
- Separate one of the six strands.
- Fold the strand in half and thread both ends through your needle.
- The other end of the thread forms a loop. Use the loop method to secure your thread when you start stitching.
4. Stitching Basics
- Follow the chart (this could be included with your blank, if not why not browse my cross stitch pattern library)
- Complete your first half cross stitch.
- Pass your needle through the loop at the end of the thread and gently tighten.
- Continue stitching until you finish the design or need to change your thread. (Don’t stitch too tightly or you won’t be able to tuck you threads under)
- To end your thread, pass the needle under three or four stitches on the back of the blank and then cut.

5. Finishing the Back (Optional)
You can leave the back of the stitched piece as is, but if you’d like to cover it up:
- Place the pendant on coordinating scrapbook paper and trace around the outside.
- Cut just inside the traced line to create a slightly smaller circle than the pendant.
- Apply a thin layer of white craft glue or Mod Podge to the back of the pendant.
- Adhere the paper circle to the back, avoiding excess glue seeping through the holes.
- Seal it by applying another thin layer of glue over the top of the paper.
- Let it dry thoroughly.
6. Attach Your Creation
Once dry, attach a jump ring or a hanging cord to hang the blank on a necklace chain, keyring or display on the all. You’ve transformed a simple wooden blank into a delightful piece of handmade art.

7. Tips and Tricks
- Burn Marks: Some wooden blanks may have slight burn marks from laser cutting. Make this side the back for best results.
- Ashy Residue: Laser cutting can leave an ashy residue, especially with organic materials like wood. Be mindful of this when handling your thread. A light sanding or a wipe with some alcohol can help remove this.
- Needle Size: Use the right size needle to avoid splitting the fibres. It should be smaller than your holes on your blank which can vary depending on manufacturer.



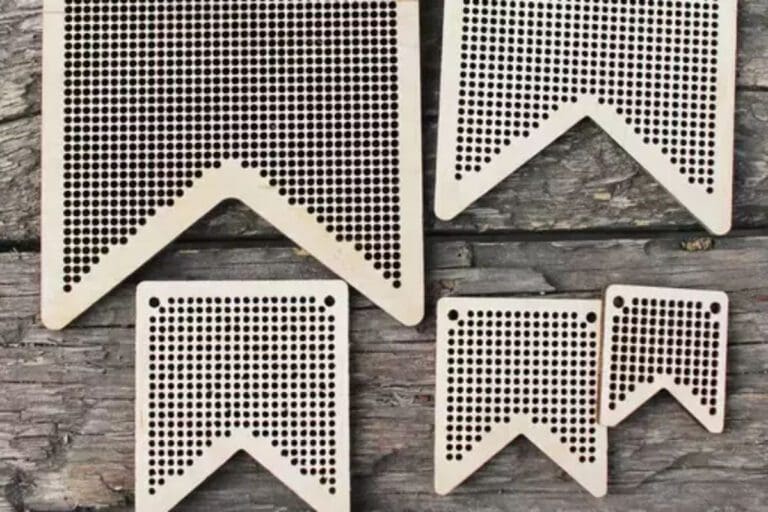


Where do you buy these blanks?
One of my favourite places to buy them is Baker ross. You can also find them on amazon and etsy