Beginner’s guide to using embroidery templates

For those of you just starting out on your stitching journey, using embroidery templates can take your creations to the next level. In this guide, I’ll explain everything you need to know about using embroidery templates to unleash your creativity and bring your designs to life in this beginners guide.

Understanding embroidery templates
Embroidery templates are pre-designed outlines that serve as guides for your stitching. They come in various forms, including paper patterns, digital files, or pre-printed fabric. Templates can range from simple shapes and motifs to elaborate designs featuring intricate details.
Choosing the right template
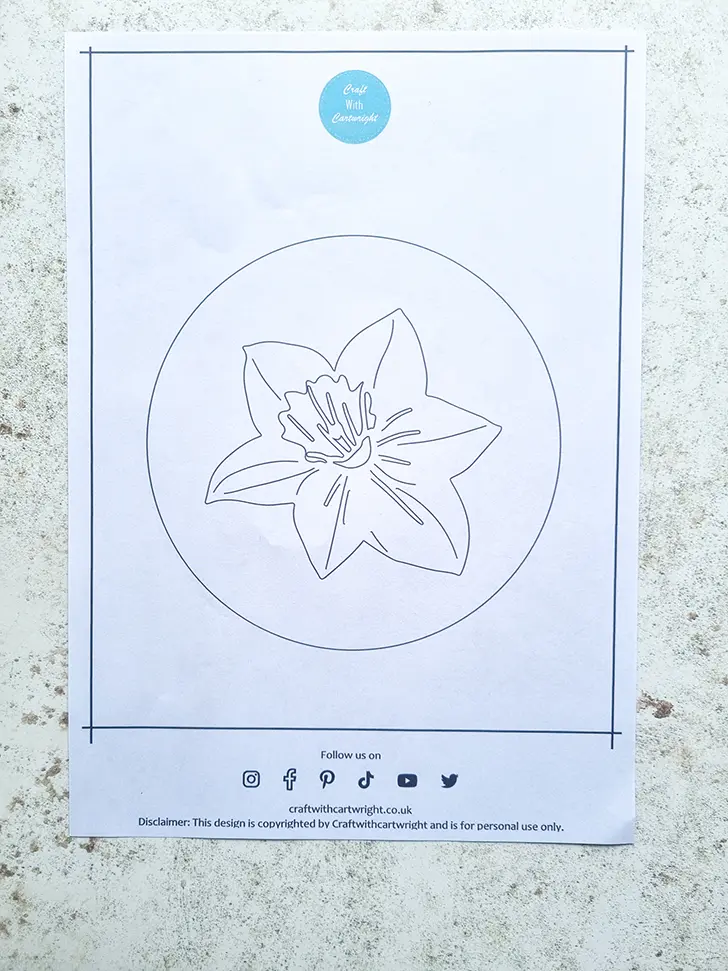
When selecting an embroidery template, consider your skill level and the complexity of the design. Beginners may want to start with simpler patterns, such as basic geometric shapes or outlines. Like my free daffodil embroidery pattern. As you get more experienced, you can challenge yourself with more intricate designs.
Preparing your materials
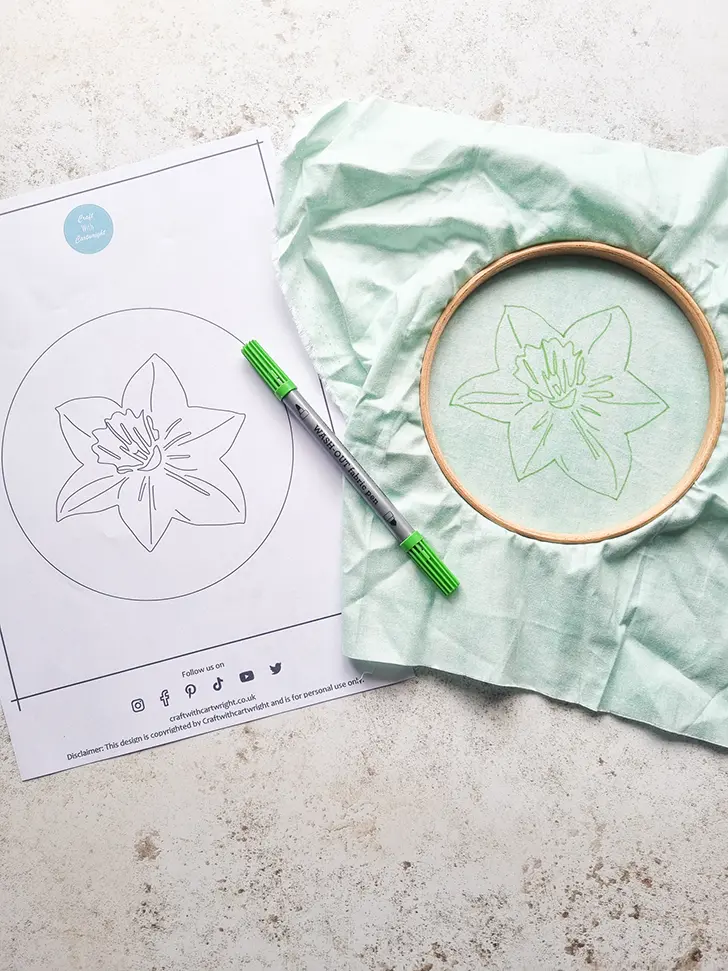
Before starting your embroidery project, gather all the necessary materials, including fabric, DMC embroidery floss, needles, and an embroidery hoop. If you’re using a my paper template, you’ll also need transfer materials like carbon paper or a water-soluble pen.
Transferring the design
If you’re using the daffodil template, transfer the design onto your fabric using your preferred method. You can trace the design onto the fabric using a light source, such as a window or lightbox, or use a transfer pen or pencil to draw the design directly onto the fabric.
Alternatively you can use the SVG template (also available to download for free at the bottom of the post), to get your Cricut machine to transfer the design directly onto the fabric using the pen tool.
Securing the fabric
Once the design is transferred, place the fabric in an embroidery hoop to keep it taut and stable while you stitch. This will ensure even stitches and prevent puckering or distortion of the fabric.
Embroidering the design
With your fabric securely in the hoop, thread your needle with embroidery floss and begin stitching according to the design. Follow the lines of the template, using your choice of embroidery stitches. For this pattern I’d recommend starting with something simple like backstitch, or you could try stem stitch, split stitch or chain stitch for a more textured finish.

Adding personal touches
Feel free to customize the design by adding your own flair or embellishments. Experiment with different colours, stitches, or additional elements to make the design uniquely yours.
Finishing touches
Once you’ve completed the embroidery, remove the fabric from the hoop and trim any excess threads. If you used a transfer method that leaves marks on the fabric, follow the manufacturer’s instructions to remove them.
Download the free Daffodil embroidery template here